Transform Your Lawn: A Guide to Sowing Clover for a Lush Clover Lawn
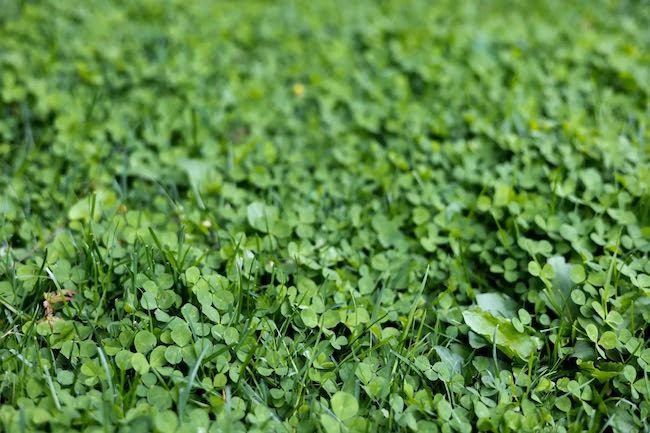
If you’re looking for a sustainable, low-maintenance alternative to traditional grass lawns, consider sowing clover over your existing lawn. Clover not only adds beauty to your yard but also enriches the soil, provides nectar for pollinators, and requires significantly less water than grass. In this article, we will guide you through the process of creating a clover lawn and maintaining moisture for optimum growth for the first 14 days.
Benefits of a Clover Lawn
- Low Maintenance: Clover requires less mowing and minimal fertilization.
- Soil Enrichment: As a legume, clover fixes nitrogen in the soil, improving fertility.
- Drought Resistant: Clover thrives in dry conditions, making it an excellent choice for water conservation.
- Pollinator Friendly: The blossoms attract bees and other beneficial insects.
Choosing the Right Clover Variety
Before you begin, it’s important to select the right type of clover for your lawn. The three most common clover varieties are:
- White Clover: Ideal for moderate to high traffic areas; it grows well in a variety of soil types.
- Red Clover: Thrives in fertilized soils and is often used for patches in garden areas.
- Micro Clover: A smaller variety that blends seamlessly with grass, offering a lush green appearance.
Preparing Your Lawn for Clover Sowing
Preparation is key to a successful transition to a clover lawn. Follow these steps to create the ideal environment:
- Mow Your Existing Lawn: Cut the grass shorter than usual (around 2 inches) to allow the clover seeds to reach the soil.
- Rake the Lawn: Remove any debris, dead grass, and leaves to expose the soil surface.
- Identify Bare Spots: If there are any thin or patchy areas, make a note of these for the best results.
Sowing Clover Seeds
Once you have prepared your lawn, it’s time to sow your clover seeds. Here’s how to do it:
- Mix Seeds with Sand: To ensure even distribution, mix clover seeds with sand at a ratio of 1:5.
- Sow the Seeds: Using a broadcast spreader, evenly distribute the clover mixture over your existing lawn. Alternatively, you can manually sprinkle it if you don’t have a spreader.
- Lightly Rake Again: Use a rake to lightly cover the seeds with soil, ensuring good seed-to-soil contact.
- Water Immediately: Water the area gently using a fine spray to avoid washing away the seeds.
Keeping Your Clover Lawn Moist
The first 14 days are crucial for the germination of your clover seeds. Here’s how to keep them moist:
- Install a Spray Line: Set up a garden spray line or use a hose with a spray nozzle to mist the area lightly. This will make it easier to maintain consistent moisture without oversaturating the soil.
- Water Frequency: Water the area 2 to 3 times daily in the first week. As the seeds germinate in the second week, gradually reduce watering to once daily.
- Monitor Soil Moisture: Check the soil regularly by sticking your finger into the soil up to an inch deep. If it feels dry, it’s time to water.
Maintaining Your Clover Lawn
Once your clover has germinated and established itself, maintaining it is simple:
- Avoid Over-Mowing: If you choose to mow, keep the blades high. This allows the clover to flourish while also controlling weeds.
- Watch for Weeds: Hand-pull any weeds that may appear, especially in the early stages.
- Fertilization: Fertilize occasionally with organic fertilizers; clover thrives in nutrient-rich soils.
Conclusion
Sowing clover over your existing lawn is a simple yet rewarding project that can transform your outdoor space. Not only does it create a beautiful green carpet, but it also promotes biodiversity and requires less maintenance than traditional grass. With the right preparation and care during the early stages, your clover lawn will flourish, providing a sustainable and attractive alternative for years to come.