Sprouts and microgreens- what’s the difference
At first glance, they might look like the same thing: tiny, green, and packed with nutrients. But in reality, sprouts and microgreens are quite different — from how they’re grown, to how they taste, and even how they benefit your health.In this article, we’ll break down the key differences between sprouts and microgreens, take a closer look at the most popular types, and show you how to grow your own fresh greens at home. So if you’ve ever wondered, “Are microgreens the same as sprouts?” — you’re in the right place. Let’s get into it!
1. Microgreens vs Sprouts: What’s the Real Difference?
1.1 What Are Sprouts and Microgreens?
Sprouts and microgreens might look similar at first, but they’re actually quite different — especially when it comes to how they grow and how we use them. Sprouts are the very beginning of a plant’s life. They’re usually ready to eat just a few days after germination, grown entirely in water, and you eat the whole thing: root, shoot, and seed.
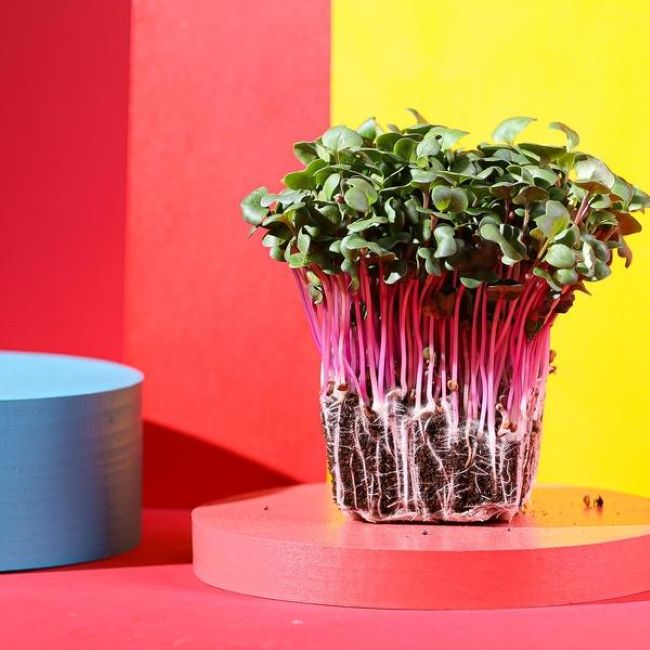
Microgreens, on the other hand, are a bit more grown-up. They need soil (or a growing mat), light, and a little more time — usually around 7 to 14 days. Once they’ve developed their first set of true leaves, they’re harvested by cutting just above the roots. So, unlike sprouts, with microgreens you’re only eating the stems and leaves.
You’ll also notice a difference in how they look. Sprouts are pale and thread-like, while microgreens are leafy, colorful, and often packed with flavor. And if you’ve heard the term “sprouting microgreens”, it’s good to know that while they both start with seeds, growing microgreens takes a bit more effort — but the result is a more flavorful and versatile green.
1.2 How they’re used in the kitchen
Both sprouts and microgreens have their place in the kitchen, but they serve different purposes. Sprouts are usually eaten raw and add a light crunch to sandwiches, salads, or wraps. They’re mild in flavor and used mostly for texture and freshness.
Microgreens, however, are known for their bold taste and visual appeal. With so many types of microgreens to choose from — like radish, beet, sunflower, or arugula — they offer a wide range of flavors, from peppery to sweet. Chefs love them for plating, garnishing, or boosting the nutritional content of a dish.
2. How Sprouts and Microgreens Are Grown
Understanding the distinct cultivation methods for sprouts and microgreens is essential for successful growth. While both originate from seeds, their growth processes, environmental requirements, and harvesting techniques differ significantly.
2.1 Sprout Growing Conditions: Water, Humidity, and Darkness
Sprouts are germinated seeds consumed shortly after they begin to grow, typically within 2 to 7 days. The cultivation process involves:
- Medium: Sprouts are generally grown hydroponically, meaning they’re cultivated in water without the use of soil or other solid growing mediums.
- Moisture and Humidity: Maintaining a consistently moist environment is crucial. Seeds are usually rinsed multiple times a day to ensure they remain hydrated and to prevent mold growth.
- Light Exposure: Sprouts don’t require light during their initial growth phase. In fact, they’re often kept in dark or low-light conditions to encourage elongation and proper development.
- Air Circulation: Proper ventilation is essential to prevent bacterial contamination, a common concern in the humid conditions favorable for sprout growth.
Due to their rapid growth cycle and the conditions they thrive in, sprouts are more susceptible to mold and bacterial issues. Therefore, maintaining cleanliness and monitoring environmental factors closely is imperative.
2.2 Microgreen Cultivation: Soil or Medium, Light, and Time
Microgreens are young vegetable greens harvested after the first true leaves have developed, typically between 7 to 21 days, depending on the variety. Their cultivation involves:
- Growing Medium: Microgreens are commonly grown in soil or on soilless mediums like coconut coir, hydroponic grow mats, or other fibrous materials. The choice of medium can influence nutrient availability and water retention.
- Light Requirements: Unlike sprouts, microgreens require ample light for photosynthesis once germinated. Natural sunlight or grow lights can be used to provide the necessary illumination. Proper lighting ensures vibrant coloration and robust growth.
- Watering Practices: Consistent moisture is vital. However, overwatering can lead to mold issues. Using trays with drainage holes can help prevent water accumulation.
- Air Circulation: Good airflow helps reduce the risk of fungal diseases and strengthens the plants. Using fans or ensuring natural ventilation can be beneficial.
- Temperature and Humidity: Maintaining moderate temperatures and humidity levels promotes healthy growth. Extreme conditions can hinder development or encourage disease.
2.3 Growing Tools and Space Requirements
The tools and space needed for cultivating sprouts and microgreens vary:
- Sprouts:
- Equipment: Require minimal equipment—typically just jars or sprouting trays, and a mesh lid or cloth for drainage.
- Space: Can be grown on a kitchen countertop, making them ideal for those with limited space.
- Maintenance: Daily rinsing is necessary to keep seeds moist and to prevent mold growth.
- Microgreens:
- Equipment: Need shallow trays (with or without drainage holes), a growing medium, and access to light sources.
- Space: While they require more space than sprouts, microgreens can still be grown indoors on shelves, windowsills, or under grow lights.
- Maintenance: Regular watering, monitoring for pests or diseases, and ensuring adequate light are essential for healthy growth.
3. Which Parts Are Edible: Sprouts vs Microgreens
3.1 What Parts of Sprouts Do We Eat?
Sprouts are harvested very early in the plant’s life — typically within 2 to 5 days after germination — and when it comes to eating them, you consume the whole plant. That includes the seed, the emerging root (radicle), and the shoot. In some varieties, you might even notice the seed coat still attached, and that’s edible too.
Because sprouts are grown in water without soil, the entire structure is kept clean (assuming proper hygiene during cultivation) and doesn’t need cutting or trimming. They’re eaten raw, most commonly added to salads, sandwiches, or wraps for a crisp texture and mild taste.
3.2 What Parts of Microgreens Are Harvested?
Microgreens grow for a bit longer — usually 7 to 21 days — and are harvested at a more developed stage, once the first true leaves appear. Unlike sprouts, you don’t eat the roots or the seed. Microgreens are cut above the growing medium, and only the stem and leaves are consumed.
This means harvesting microgreens requires tools like scissors or a sharp knife to avoid damaging the delicate greens. Since they’re grown in soil or mats, proper harvesting is important to prevent contamination from the growing medium.
3.3 Taste, Texture, and Safety Implications
Sprouts and microgreens not only differ in which parts are eaten, but also in flavor, texture, and food safety concerns.
Sprouts tend to be more neutral in flavor — crisp, watery, and light. Their biggest appeal is texture and freshness, making them a great raw topping. However, because they’re grown in warm, moist, enclosed conditions, sprouts are more susceptible to bacterial contamination (like E. coli or Salmonella) if hygiene isn’t carefully maintained.
Microgreens, by contrast, often have a more concentrated flavor — spicy, tangy, earthy, or even sweet, depending on the type of microgreen (like radish, arugula, or beet). They’re safer to consume raw when grown in clean conditions, especially with good air circulation and proper watering. Since the root remains in the tray, there’s less risk of introducing pathogens into your dish — as long as the greens are harvested cleanly and stored properly.
4. Types of Microgreens: A Guide to Popular Varieties
4.1 Most Common Types of Microgreens for Beginners
If you’re just getting started with growing microgreens, the good news is — there are plenty of beginner-friendly options to choose from. Some varieties are fast-growing, low-maintenance, and very forgiving, making them perfect for home growers or anyone new to indoor gardening.
Among the easiest types of microgreens to grow are:
- Radish – quick to sprout, with a spicy kick and crunchy texture.
- Broccoli – mild and nutrient-packed, great for salads and smoothies.
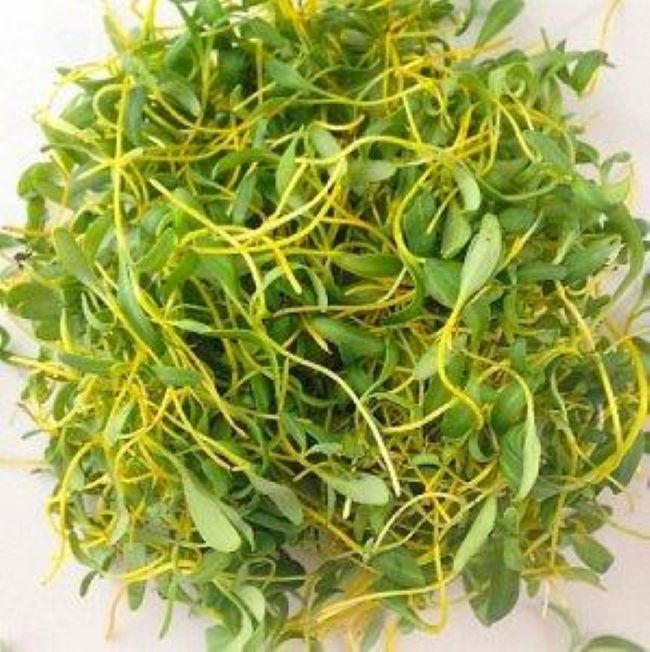
- Pea shoots – slightly sweet with tender, curly leaves — a favorite in stir-fries and sandwiches.
- Sunflower – nutty and crunchy, often used as a base for microgreen mixes.
- Mustard – bold and peppery, perfect for adding heat to dishes.
You can find all of these varieties — and many more — available at https://mpseeds.eu/
4.2 Flavor Profiles and Culinary Uses
One of the best things about growing different types of microgreens is the variety of flavors they offer. Some are mild and subtle, while others are bold and spicy — almost like seasoning in plant form.
- Arugula microgreens add a peppery, almost tangy bite to salads and sandwiches.
- Beet microgreens bring a beautiful red hue and a slightly earthy flavor.
- Basil microgreens are aromatic and pair beautifully with tomatoes, pasta, or fresh mozzarella.
- Cilantro microgreens offer that classic citrusy punch, perfect for tacos or Asian dishes.
Because of their size and intensity, microgreens are used as garnishes, flavor enhancers, and nutrient boosters — all in one.
4.3 Growing Tips for Specific Varieties
Different microgreens have different needs — knowing these can make your growing experience smoother and more rewarding.
- Radish and broccoli prefer slightly cooler conditions and don’t need soaking.
- Peas and sunflowers, being larger seeds, benefit from pre-soaking for 8–12 hours before sowing.
- Delicate herbs like basil or cilantro may take longer to germinate and prefer more warmth and stable humidity.
Whatever type of microgreen you choose, the basics remain the same: use a clean tray, a quality growing medium, and give them enough light and airflow. Within a week or two, you’ll be harvesting your own fresh greens — straight from your windowsill.
5. Different Types of Sprouts and Their Benefits
5.1 Popular Sprouts and How They Differ
While microgreens often get the spotlight for their colors and intense flavors, sprouts are just as valuable when it comes to quick-growing, nutrient-dense greens. There are many different types of sprouts, and each brings something unique to the table — whether it’s texture, taste, or health benefits.
Some of the most popular sprouts include:
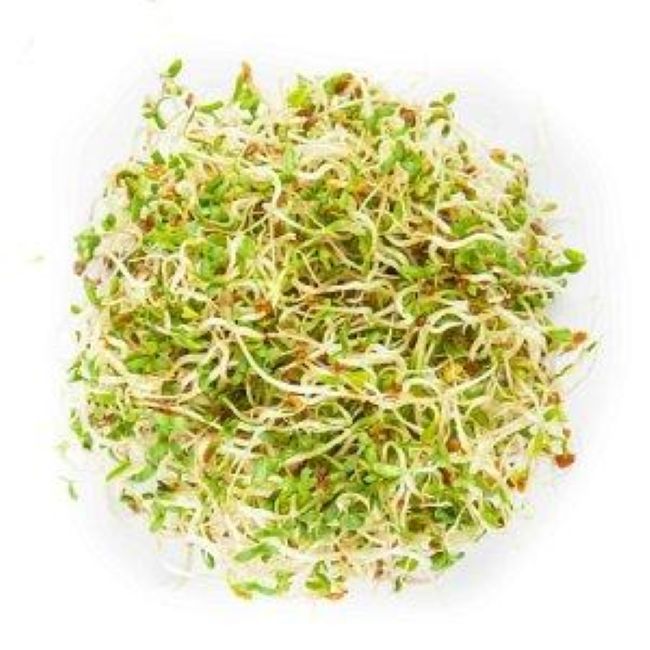
- Alfalfa – light, crunchy, and mild in flavor, perfect for topping sandwiches.
- Mung bean – slightly sweet and juicy, often used in Asian cuisine.
- Lentil – earthy and filling, great in wraps or warm dishes.
- Chickpea – nutty and firm, ideal for sprouted hummus or grain bowls.
- Radish and broccoli sprouts – slightly spicy and known for their high levels of antioxidants.
Check out our sprouting seeds: https://mpseeds.eu/seeds-for-sprouting
5.2 Nutritional Highlights of Sprout Varieties
All sprouts are packed with nutrients, but their profiles vary depending on the seed. For example, broccoli sprouts are known for their high sulforaphane content — a compound linked to detox support and anti-inflammatory benefits. Alfalfa sprouts are a good source of vitamin K and phytoestrogens, while lentil and mung bean sprouts offer plant-based protein and fiber.
Unlike some types of microgreens, which develop more complex nutrient profiles as they grow, sprouts concentrate their energy into early-stage compounds that are easy to digest and quickly absorbed. They’re especially popular in raw food diets or for people looking to add enzymes and living foods to their meals.
6. Microgreens vs Sprouts: Which One Is Better for You?
6.1 Nutritional Comparison
When it comes to nutrition, both sprouts and microgreens pack a punch — but in different ways. Sprouts are harvested within a few days of germination and are full of enzymes, amino acids, and antioxidants that are easily absorbed by the body. They’re often considered a “living food,” since they’re typically eaten raw and fresh, root and all.
Microgreens, on the other hand, have more time to develop, which means their nutrient profile is often more complex. Studies suggest that some types of microgreens — like red cabbage, cilantro, or broccoli — can contain significantly higher concentrations of vitamins C, E, and K, as well as carotenoids, compared to their mature plant versions. While the difference between sprouts and microgreens is subtle nutritionally, microgreens may have the edge if you’re looking for more concentrated vitamin content.
6.2 Which Is Easier to Grow at Home?
If speed and simplicity are what you’re after, sprouts win. They grow fast — usually within 2–5 days — and only require a jar, water, and some rinsing. No soil, no light, and very little space needed.
Microgreens, while not difficult, do need a bit more attention. You’ll need a tray, a growing medium (like soil or mats), and a source of light. They take longer to harvest — typically 7–14 days — but reward you with stronger flavors, more visual appeal, and a broader range of culinary possibilities.
Whether you’re sprouting microgreens (i.e. starting them from seed before moving them to a tray), or growing them from start to finish, they require slightly more care than sprouts but are still beginner-friendly.
6.3 Choosing Based on Taste, Convenience, and Purpose
So — microgreens vs sprouts, which should you choose? The answer really depends on what you’re looking for.
- If you want something quick, crunchy, and mild, go for sprouts.
- If you’re after bold flavor, vibrant color, and a higher nutritional payoff, microgreens might be the better pick.
If you’re into gardening, experimenting with different types of sprouts and types of microgreens is a fun way to explore new textures and tastes.
- And if you’ve ever wondered “Are microgreens the same as sprouts?” — now you know: they’re related, but not interchangeable.
At the end of the day, you don’t have to choose just one. Add both to your routine for variety, nutrition, and freshness all year round.

