How to use a dibber
How to Use a Dibber to Transplant Seedlings and Young Plants
Transplanting seedlings and young plants can be a delicate task, but with the right tools, the process becomes much easier. One such tool is the dibber, a pointed implement specifically designed to create holes for planting. Whether you’re growing vegetables, flowers, or herbs, using a dibber can save you time and ensure proper root placement for healthy growth. Here’s a step-by-step guide on how to use a dibber effectively.
What is a Dibber?
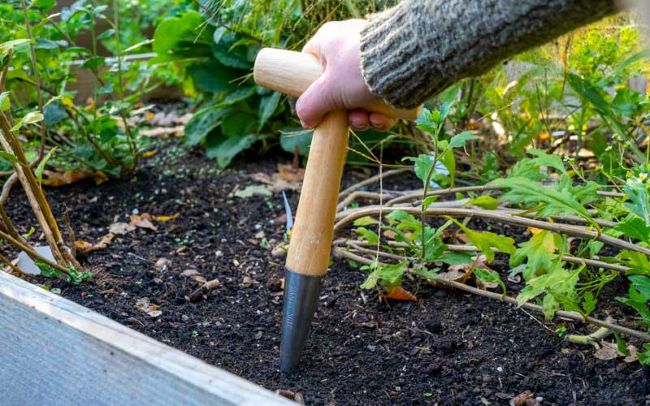
A dibber (or dibble) is a simple gardening tool with a pointed end, typically made of wood, metal, or plastic. Its purpose is to create planting holes in soil for seeds, bulbs, or small plants. Dibbers come in different shapes and sizes, including straight, T-shaped, and ergonomic designs, allowing you to choose the one that suits your needs.
Why Use a Dibber?
Using a dibber offers several benefits:
- Precision: Ensures planting at the correct depth, which is essential for seedling health.
- Efficiency: Speeds up the process of transplanting multiple plants.
- Ease of Use: Minimises soil disturbance and reduces strain on your hands and wrists.
Step-by-Step Guide to Using a Dibber
- Prepare the Soil
Before transplanting, ensure your soil is well-prepared. Remove weeds, break up large clumps, and water the area lightly if the soil is too dry. - Choose the Right Dibber
Select a dibber that matches the size of your seedlings’ root systems. For smaller plants, a thin dibber works best, while a wider one suits larger transplants. - Mark Planting Positions
Plan the spacing of your seedlings according to their growth requirements. Use the dibber or a measuring stick to mark the positions. - Create Planting Holes
Push the pointed end of the dibber into the soil to create a hole. The depth should match the root ball of the seedling. For most plants, aim for a hole slightly deeper than the root system. - Place the Seedling
Gently remove the seedling from its tray or pot, being careful not to damage the roots. Lower it into the hole created by the dibber, ensuring the roots are fully covered and the plant sits at the correct depth. - Firm the Soil
Use the dibber or your hands to gently press the soil around the base of the plant, eliminating air pockets and ensuring stability. - Water Thoroughly
After planting, water the seedlings well to help them settle and establish their roots.
Tips for Using a Dibber Effectively
- Work in Moist Soil: Dry soil can be challenging to work with, while overly wet soil may collapse the holes. Aim for a slightly damp consistency.
- Be Gentle: Avoid compacting the soil too much, as it can hinder root growth.
- Practice Consistency: Maintain uniform depth and spacing for optimal plant development.
A dibber is a versatile and invaluable tool for gardeners of all levels. By using it to transplant seedlings and young plants, you’ll ensure proper root placement, encourage healthy growth, and save time in the process. Whether you’re planting a vegetable patch, a flower bed, or a herb garden, mastering the dibber technique is a skill that will serve you well season after season.For more gardening tips and advice, explore our resources at GardenAdvice.co.uk. Happy gardening!