Maximize Your Gardening Success with Heated Propagators: A Guide for Seeds and Cuttings
Using Heated Propagators for Seeds and Cuttings
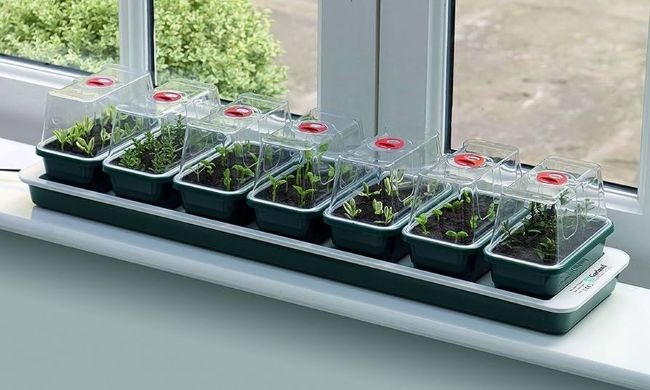
Heated propagators are one of the most useful tools for raising seeds and rooting cuttings, particularly during cooler months or when trying to speed up plant production. They create a warm, protected environment that encourages faster germination and quicker root development while helping maintain humidity around young plants.
When to Use Heated Propagators
Heated propagators are suitable for:
- Germinating seeds
- Rooting softwood cuttings
- Rooting semi-ripe cuttings
- Rooting hardwood cuttings
- Root cuttings
- Propagating tender plants and houseplants
Examples of plants that benefit from heated propagators include everything from dahlia cuttings and bedding plants to woody shrubs such as Cornus (dogwood).
How Heated Propagators Work
Most heated propagators are electrically powered and contain a heated tray or warming element beneath the seed trays or pots. This system operates similarly to a low-level electric blanket but is safely enclosed within a waterproof plastic propagator tray.
The gentle warmth heats the compost from below, resulting in:
- Faster seed germination
- Quicker root production
- Improved propagation success
- Earlier sowing during spring
However, most standard propagators are not thermostatically controlled, which means they can sometimes become too warm if left on continuously. Overheating can lead to:
- Dry compost
- Weak and leggy seedlings
- Wilting cuttings
- Increased fungal diseases
To prevent these issues, we recommend:
- Switching propagators on during the daytime
- Switching them off overnight
- Using a simple plug-in timer to automate the process
Choosing the Right Compost for Seeds and Cuttings
For optimal results when sowing seeds and rooting cuttings, use a light, open compost mix that drains well while retaining enough moisture around developing roots. A typical propagating mix consists of:
- Approximately 50% standard seed or potting compost (e.g., John Innes No. 1)
- Approximately 50% perlite or vermiculite
The inclusion of perlite or vermiculite improves:
- Drainage
- Air movement within the compost
- Root development
- Resistance to rotting
Before filling trays or pots, ensure the compost is thoroughly wetted, as dry compost can be challenging to re-wet evenly later.
Sowing Seeds and Inserting Cuttings
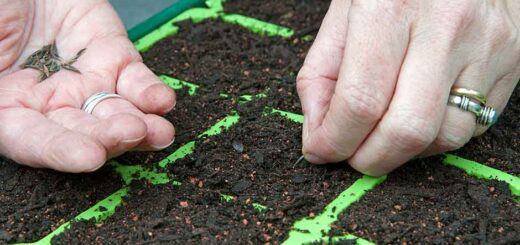
Seeds should be sown as usual using the lighter propagating compost mix. Most forms of cuttings can also be rooted successfully in heated propagators, including:
- Softwood cuttings
- Semi-ripe cuttings
- Hardwood cuttings
- Root cuttings
Once seeds or cuttings are in the trays, water them thoroughly again and allow any excess water to drain away before placing the trays onto the heated base of the propagator.
Maintaining Humidity
Maintaining humidity is vital for successful propagation. Heated propagators should ideally feature:
- A clear plastic cover
- A Perspex lid
As the compost warms, moisture evaporates into the air, and the clear lid traps this moisture, creating a warm, humid atmosphere around the seedlings or cuttings. This is crucial for cuttings, which have no roots and cannot replace moisture lost through their leaves. High humidity reduces moisture loss, keeping cuttings alive until they can form roots.
Watering and Ongoing Care
Regular watering is essential because the heated base tends to dry the compost gradually. A good routine involves:
- Removing trays from the propagator once a week
- Giving them a thorough soaking
- Allowing excess water to drain away
- Returning the trays to the heated base
- Replacing the clear lid to maintain humidity
The compost should remain evenly moist but never saturated.
Preventing Disease
Warm, humid conditions are ideal for propagation but can also foster fungal and bacterial diseases if hygiene is neglected. Regularly check trays for signs of:
- Damping off disease
- Rotting cuttings
- Fungal moulds
- Weak or collapsing seedlings
If you find infected seedlings or cuttings, remove them immediately and dispose of them away from the propagator to prevent the infection from spreading.
Positioning the Propagator
The location of your propagator is crucial. It should be placed:
- In a bright position with good natural light
- Away from intense direct sunlight
Too much direct sunlight can rapidly overheat the propagator, scorching seedlings or cuttings. In a greenhouse, ensure to provide shading during sunny periods.
When to Remove Seedlings
Once seedlings have germinated and developed their first pair of seed leaves, it’s usually best to remove them from the heated propagator. If left too long in the warm conditions, they can become weak and leggy.
For cuttings, rooting times vary greatly—often between 6 to 12 weeks. Once rooted, remove them from the heated base and move them to a bright, cooler area to encourage stronger growth.
Using Rooting Hormone Powders
While traditional hormone rooting powders have been utilized to encourage root formation, many gardeners find that establishing ideal propagation conditions often yields better results than relying on hormones alone. Providing warmth, humidity, good hygiene, correct watering, and quality parent material will usually lead to successful propagation.