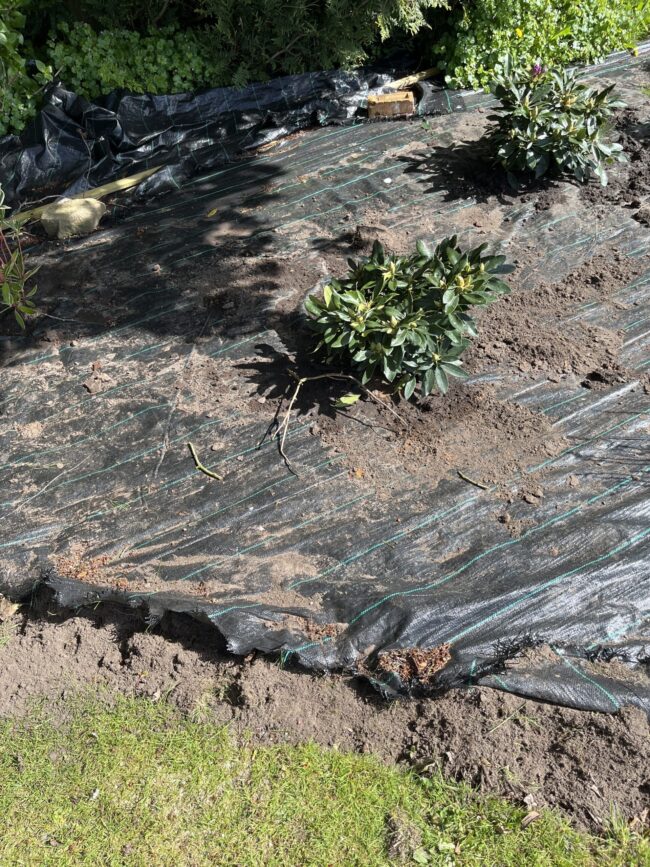
Planting through black plastic sheeting
Planting Through Landscape Sheeting – A Practical Method for Creating Low-Maintenance Borders

6
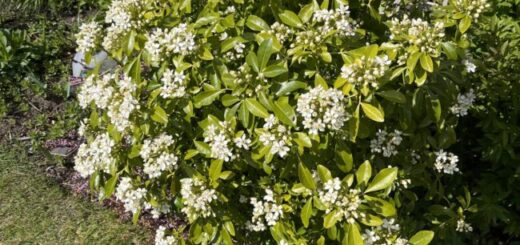
Creating a new planting bed in an existing lawn can be time-consuming if you dig everything out by hand. A much more efficient and reliable method is to use landscape sheeting (woven weed control fabric) to prepare the ground and then plant directly through it. This approach not only suppresses weeds but also improves soil structure over time and helps retain moisture—making it particularly useful for establishing shrubs such as rhododendrons and azaleas.
Step 1: Mark Out and Cover the Area
Start by marking out the shape and size of the bed you want to create directly onto the lawn. Once you’re happy with the layout, lay the landscape sheeting over the area, ensuring it fits neatly to your design.
Peg the sheeting down securely using metal or plastic pins (simple wire “U” pins work well). The key here is to make sure the sheeting is tight to the ground to prevent light getting underneath.
Step 2: Leave the Sheeting in Place
Leave the covered area for around 4–6 months (longer if possible). During this time:
- The grass underneath dies due to lack of light
- Worm activity increases, breaking down the dead turf
- Organic matter is gradually incorporated into the soil
This natural process improves soil structure without the need for digging, effectively doing the hard work for you.
Step 3: Planting Through the Sheeting
Once the ground beneath has softened and the grass has decomposed, you can begin planting.
Cut a simple cross or circular hole in the sheeting where each plant will go. Fold back the flaps and dig your planting hole as normal.
This method works particularly well for:
- Rhododendrons
- Azaleas
- Other shrubs that benefit from consistent moisture and reduced weed competition
After planting, firm the soil back in and fold the sheeting back neatly around the base of the plant.
Step 4: Apply Mulch
Cover the entire area with a generous layer of mulch, such as:
- Bark
- Wood chips (preferably hardwood like oak or ash)
This serves several purposes:
- Improves appearance
- Further suppresses weeds
- Helps retain moisture
- Protects the sheeting from UV degradation
Step 5: Ongoing Maintenance and Feeding
One of the advantages of this method is flexibility over time.
As the plants establish, you can:
- Cut larger circles around each plant to allow for feeding
- Top dress with compost or organic matter in autumn
- Eventually remove sections of the sheeting if the bed becomes densely planted
The sheeting continues to help regulate moisture levels, which is especially useful for acid-loving plants like rhododendrons and azaleas.
Why This Method Works Well
Weed Suppression
The sheeting blocks light, preventing weed germination and reducing maintenance.
Soil Improvement Without Digging
Natural decomposition of grass and root systems enhances soil structure and fertility.
Moisture Retention
Water is conserved in the soil, making it more available to newly planted shrubs.
Efficient Bed Creation
It allows you to convert lawn into planting beds quickly with minimal labour.
Planting through landscape sheeting is a practical, scalable method that works particularly well for larger projects or where time is limited. It’s ideal for establishing shrub borders with minimal disruption and sets up a garden bed that is easy to maintain in the years ahead.
Over time, as planting fills out, you can gradually adapt or remove the sheeting—but in the early stages, it provides an excellent foundation for strong, healthy growth.