What the best liner is and the best under layers we’re thinking
23 September 2026
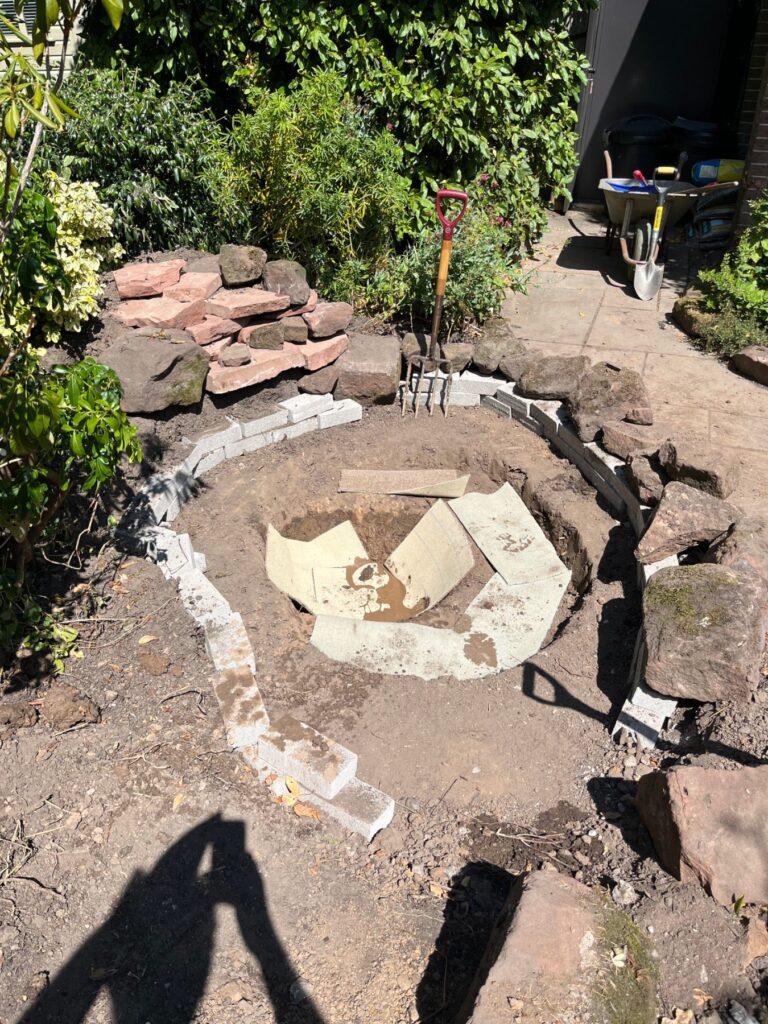
That pond shape looks good, and with all the stone around it the **main priority is protecting the liner from punctures**. I would **not rely on old carpet as the main underlay**.
## Best pond liner
For this sort of garden wildlife pond, I’d use:
### **Best choice: EPDM rubber liner**
- Choose **0.75 mm EPDM** for a normal garden pond.
- Use **1.0 mm EPDM** if you are placing heavy rocks around the edge or if there are sharper block/stone areas nearby.
- EPDM is flexible, long-lasting, UV-resistant and easier to fold into curves than cheaper PVC.
### Avoid if possible
- **Cheap PVC liner** — it can become brittle over time.
- **Preformed plastic ponds** — less flexible and harder to fit into your natural stone layout.
## Underlay: what to use underneath
I’d use a layered approach:
1. **Remove sharp stones, roots and rubble**
- Go over the whole pond base and sides by hand.
- With your stonework nearby, even small sharp bits can puncture the liner once the pond is full.
2. **Add a soft sand blinding layer**
- Use **25–50 mm of soft builders’ sand** over the base and shelves.
- Firm it gently so there are no hollows.
3. **Use proper pond geotextile underlay**
- This is much better than carpet.
- It does not rot, hold chemicals, or break down unpredictably.
- Run it up and over the pond edges.
4. **Lay the EPDM liner**
- Let it warm in the sun if possible so it becomes more flexible.
- Avoid stretching it tight; allow it to settle into the shape.
5. **Add extra protection where stones will sit**
- Where you place rocks on top of the liner, put **another layer of pond underlay or offcuts of liner** between the liner and the stones.
- Never place sharp rocks directly on the liner.
## Should you use old carpet?
I’d avoid using old carpet as the main underlay.
It can:
- contain old cleaning chemicals or backing compounds
- rot or break down
- hold water and smell
- hide tacks, staples or sharp grit
- create uneven pressure points under the liner
If you already have some and really want to reuse it, only use it as an **extra protective layer beneath proper pond underlay**, never instead of it, and only if it is clean, synthetic, dry, and completely free from grippers, staples and nails. But ideally, use proper pond underlay.
## Important edge detail from your photo
Because you have blockwork and stone around the edge, I’d do this:
- Make sure the pond rim is **perfectly level** all the way around before fitting the liner.
- Round off or pad any sharp block corners with sand, mortar smoothing, old liner offcuts, or underlay.
- Leave at least **300 mm extra liner overlap** beyond the final water edge.
- Fill the pond before trimming the liner — the weight of water will pull it into position.
- Hide the edge afterwards with flat stones, turf, gravel or planting pockets.
## Liner size guide
Measure the pond at its widest and longest points, then use:
**Liner length = pond length + twice the maximum depth + 60 cm extra**
**Liner width = pond width + twice the maximum depth + 60 cm extra**
So if the pond is 2 m long, 1.5 m wide and 0.5 m deep:
- Length: 2 + 1 + 0.6 = **3.6 m**
- Width: 1.5 + 1 + 0.6 = **3.1 m**
I’d round up rather than cut it fine.
## Wildlife pond safety
As this could become a useful wildlife feature in Helen and Dave’s garden, make sure at least one side has a **gentle beach or escape slope**. GardenAdvice notes that shallow ponds or water areas should have easy escape edges for toads, and that toads can help with natural slug control by feeding on slugs and other invertebrates . It’s also important for hedgehogs, as GardenAdvice guidance highlights that ponds should have sloping sides, half-submerged rocks, mesh, or other escape routes so hedgehogs do not become trapped .
## My recommendation for your pond
For this pond I’d go with:
- **1.0 mm EPDM liner**
- **25–50 mm sand layer**
- **proper geotextile pond underlay**
- **extra underlay or liner offcuts beneath any stones**
- **a shallow wildlife escape shelf or beach area**
That will give you the most reliable, long-lasting finish and reduce the risk of leaks once the stone edging goes in. You’re at the stage where a little extra protection now will save a lot of trouble later.