How To Deal With Heavy Clay Soil In The Garden.
Gardening on heavy clay soil presents a unique set of challenges — but also opportunities. When you understand what clay soil is doing beneath your feet, you can turn it from an obstacle into a productive growing medium. This guide walks you through what clay soil is, why it can be problematic, and detailed, practical steps for improving it to create a healthy, workable soil that your plants will love.
1. What is Clay Soil — and Why It Matters
“Clay soil” refers to soil in which a large proportion of the particles are very fine (clay-sized). These very fine particles pack tightly together, meaning:
- Water drains slowly (or may sit on the surface).
- Air movement is restricted, so plant roots may struggle for oxygen.
- The soil becomes hard when dry — making digging more difficult.
- During wet periods it becomes sticky, smelly and can smother plants.
- When compacted, it is prone to surface cracking when dry, and churning into a sticky mess when wet.
So, while clay soils often contain reasonable levels of natural fertility (they hold nutrients well because the fine particles have a large surface area), the physical conditions make life harder for gardeners and plants.
In the UK particularly (where rainfall may be moderate to heavy and soils may already carry a high moisture load), managing clay effectively is essential.
2. Recognising Heavy Clay Soil in your Garden
Before you begin improvement, it’s helpful to confirm you’re dealing with heavy clay. Some tell-tale signs:
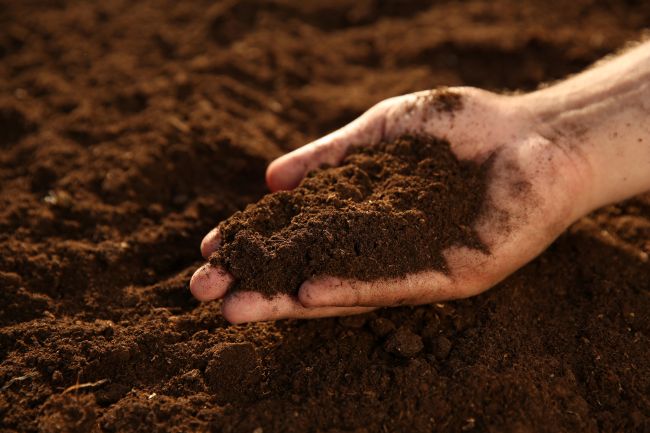
- The soil feels very dense, hard and “claggy” when moist — more like modelling clay than soil.
- After rainfall, water may puddle on the surface or you may find standing water in low spots.
- When dry, the surface cracks and may break into large, hard lumps.
- Digging is difficult: spades seem to “bounce” off the surface or you encounter smelly sticky clay that sticks to the tool.
- Once turned, the soil may stay very compacted and slow to warm in spring.
- Roots of plants may sit very shallowly or grow horizontally rather than downwards, struggling for air and drainage.
If several of these symptoms apply, you’ll benefit from going deeper than standard amendment and taking a structured approach to improvement.
3. Why Improving Clay Soil is Worth the Effort
Improving heavy clay soil is more than just making it easier to dig. The benefits include:
- Better drainage and oxygen flow → healthier root systems, reduced risk of root-rot or waterlogging.
- Improved soil structure → easier to dig, better for planting, better for root penetration.
- Better warm-up in spring → lightweight, open soils warm faster, so you can plant earlier.
- Increased biological activity → earthworms and beneficial microbes thrive when the soil is looser and more aerated, which in turn builds fertility and tilth.
- Reduced compaction over time → less maintenance, fewer problems with crusting or surface sealing.
In effect, you transform a difficult soil into a more reliable garden foundation — especially important for borders, vegetable beds, shrubs and trees.
4. A Step-by-Step Approach to Improving Heavy Clay Soil
Here’s a detailed sequence you can follow — from assessment to long-term maintenance.
a) Timing and preparation
- Choose a reasonably dry period: clay is best worked when it’s moist but not sodden. Avoid digging when the soil is fully saturated or when it’s very dry and brittle — both extremes increase risk of damage.
- Clear the area of weeds, old roots, debris, stones and large clods.
- Mark out the area you plan to work: borders, new beds, veggie plots. This gives you a contained zone for improvement.
b) Dig out or loosen the soil
- One option: fully excavate the poor clay soil and replace with improved soil/compost mix. This is labour-intensive and costly, and often only practical for smaller beds or new landscaping. The GardenAdvice original article on clay soil original article mentioned this Click Here
- A more practical option: loosen the existing clay by digging or forking deeply (30–45 cm or more) to break up compacted layers — this allows air, roots and water to reach deeper. Remove any large stones or chunks of unmoved clay.
c) Incorporate genuine amendments
- Add bulky organic matter: well-rotted compost, leaf mould, garden compost or good quality manure. These help improve structure, increase organic content, and build soil biology.
- Add a moderate amount of sharp or grit sand (builder merchant grade) if drainage is particularly poor — this helps open up the soil matrix and create pathways for water drainage. The GardenAdvice original article on clay soil original article mentioned this Click Here
- Mix the amendments thoroughly into the loosened clay — aim for mixing through the top 20–30 cm at least, ideally deeper if you can manage.
- Rake and level the surface after mixing.
d) Install the bed and plant
- Once mixed, allow the bed to settle for a week or two if possible, then plant. Perennials, shrubs and vegetables all benefit.
- Choose plants that tolerate heavier soils initially, while the improvement process is consolidating (e.g., shrubs like hydrangeas, astilbe, hellebores).
- Ensure you provide proper planting holes: dig larger than the root-ball, backfill with the improved soil mix, firm gently.
e) On-going maintenance and improvement
- Each year, add an annual top-dressing of compost or leaf mould across the bed (2–3 cm thick).
- Avoid heavy traffic across the bed (especially when wet) and avoid digging in very wet conditions — this helps prevent re-compaction.
- Use mulches (bark chips, straw, shredded leaves) to protect the soil surface, reduce erosion and maintain moisture balance.
- Over time (several seasons) the soil will gradually lighten, become more friable, easier to dig, better drained. Keep incorporating organic matter annually.
- Consider planting a cover-crop or green-manure crop in late summer/early autumn (e.g., clover, vetch, rye) to build organic content and protect the soil structure during non-growing periods.
5. Common Mistakes & How to Avoid Them
- Digging when too wet: Working saturated clay compacts it further. Avoid digging when it sticks to your spade or your boots make deep footprints.
- Adding only sand without organic matter: While sand may loosen the soil, it won’t improve fertility or biological life — and if not mixed well can lead to a “concrete” effect in some soils.
- Not mixing amendments deeply enough: Superficial top-dressing alone may improve surface action but the subsoil remains compacted, limiting root growth.
- Failing to protect the soil after improvement: Heavy clay soils can slip back into compaction if they’re no longer actively managed.
- Planting unsuitable plants too soon: Some plants require free-draining soil and may suffer early failures in newly improved clay beds. Use tough, clay-tolerant plants initially.
6. Best Plants for Improved (or Naturally Heavy) Clay Soil
While you’re improving the soil you can still be planting! Here are plants that tolerate clay soil particularly well (UK-friendly):
- Shrubs: hydrangea, buddleia, cornus (dogwood)
- Perennials: astilbe, hellebores, rudbeckia, liatris
- Trees: Acer rubrum, Gleditsia triacanthos, Betula (birch) (if drainage improved)
- Vegetables: Brussel sprouts, kale, parsnips, potatoes (once soil loosened)
- Bulbs: Allium species, daffodils, hyacinths — many tolerate heavier soils if drainage is acceptable.
7. When Replacement Might Make Sense
If the clay layer is extremely deep, or the area is going to be hard-landscaped (e.g., a formal raised border, patio planting area, rooftop garden), replacing the soil may be the most cost-effective long-term option. This involves removing the heavy clay, installing a drainage layer, and back-filling with a suitable planting mix. For larger existing beds this can be disruptive and expensive — so improvement in place is often the practical route.
8. Long-Term Soil Health & Monitoring
- Test the texture now and then: Feel the soil, do a ribbon-test (squeeze a moist handful — heavy clay will form a long ribbon), check drainage.
- Monitor how plants perform: Poor root growth, topsitting plants, waterlogging after rain — may indicate you still have drainage issues.
- Record what you add each year: Track how many bags of compost, leaf mould, sand etc you add — build a maintenance schedule.
- Be patient: Structural improvements in clay soil take time. You may not see major change in one season — but cumulative over two-three years you’ll see a big difference.
Heavy clay soil often gets a bad reputation — but with the right approach it can become a very productive garden soil. By loosening, amending with organic matter and (when needed) sand or grit, improving drainage and nurturing soil biology, you create a stable, fertile growing medium. It’s all about moving from “difficult to dig and waterlogged” to “friable, rich, root-friendly”.
If you’re gardening in the UK and tackling a front border, a veggie plot, or a woodland edge bed, this approach will set you up for success. Consistent annual effort and care will pay off — your plants, your spade and your patience will be rewarded.


