Using Heated Propagators to Grow Your Own Plants
Heated windowsill propagator Click Here
At GardenAdvice, we’re always encouraging members and clients to grow their own shrubs and perennial plants from cuttings. Not only is it a rewarding process, but it can also save a considerable amount of money—especially when planting a full garden over time.
While traditional propagation methods such as taking semi-hardwood cuttings such as hydrangea cuttings and placing them into pots are effective, using a heated propagator can significantly improve success rates and speed up the rooting process.
What Is a Heated Propagator?
A heated propagator is a simple device that provides gentle bottom heat to a seed tray or cutting tray. This warmth stimulates cell division at the base of the cutting, encouraging faster and more reliable root development.
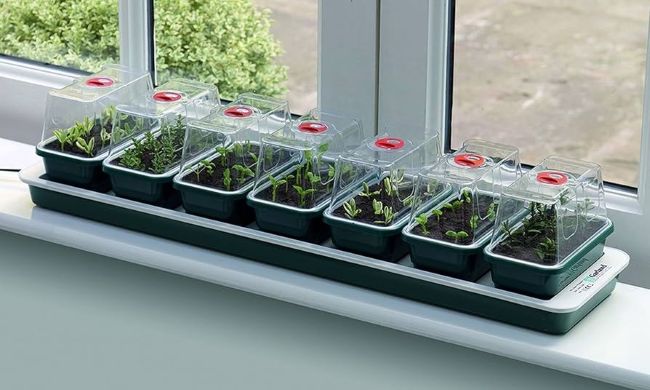
Most gardeners use windowsill propagators, which typically include:
- A heated base or mat
- A seed tray
- A clear plastic lid with ventilation holes
These are compact, affordable (usually under £50), and ideal for home use.
Why Use Bottom Heat?
The main benefit of a heated propagator is consistency. By gently warming the compost, you can:
- Encourage faster rooting
- Improve success rates
- Achieve more uniform results
This is particularly helpful for slower-rooting plants such as camellias, acers, rhododendrons, and many other woody shrubs.
Managing Heat and Timing
One downside of many budget propagators is that they don’t include a thermostat, meaning they run continuously when plugged in.
Our recommendation:
- Switch the propagator off overnight
- Or use a timer plug to control usage by switching off overnight
This helps prevent overheating while still providing enough warmth during the day to promote rooting.
Creating the Ideal Environment
The clear lid acts like a mini greenhouse, maintaining humidity around the cuttings.
Moisture evaporates from the compost, condenses on the inside of the lid, and then drips back into the compost—creating a self-sustaining humid environment.
Even so, it’s important to:
- Check moisture levels regularly
- Ventilate occasionally to prevent mould
Choosing the Right Compost Mix
The compost mix is key to successful propagation.
We recommend:
- 50% John Innes No.1 compost
- 50% vermiculite or perlite
This creates a balance of moisture retention, drainage, and airflow for developing roots.
For certain cuttings, such as cornus stems, you can also use well-watered sharp sand. Avoid builders’ sand, as it may contain impurities or excess lime.
Using Heated Propagators for Seeds
Heated propagators are also excellent for seed germination. The added warmth speeds up germination and improves consistency.
However, once seedlings emerge, they should be removed from the propagator to prevent them from becoming leggy.
Potting On Rooted Cuttings
Once your cuttings have rooted:
- Carefully lift them from the tray
- Prick them out into individual pots
- Grow them on in a bright, sheltered space
This is where the real value comes in—each cutting becomes a plant that would otherwise cost significantly more to purchase.
A Small Investment with Big Returns
A heated propagator is a low-cost tool that quickly pays for itself. After just a few successful cuttings, you’ll recover the initial cost while building your own supply of plants.
More importantly, it gives you greater control over plant production and a deeper connection to your garden.
If you’re looking to improve your propagation success, a heated propagator is one of the most useful additions to your gardening setup. It simply makes the process faster, more reliable, and more enjoyable.


